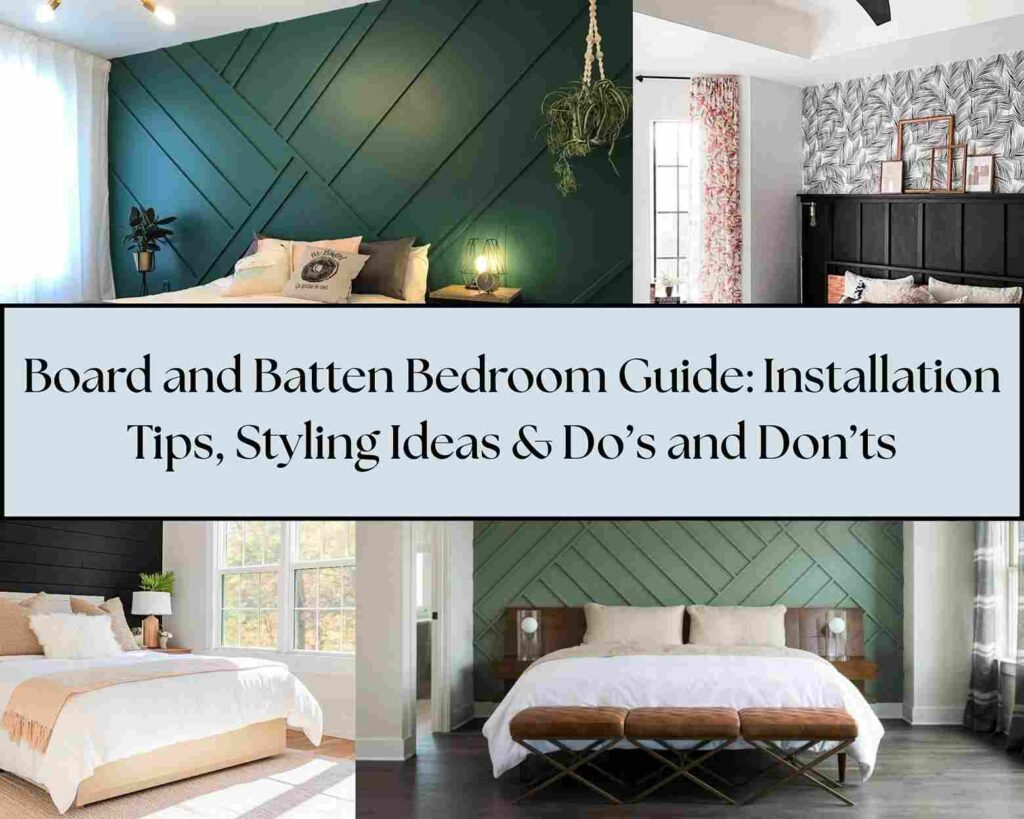
The board and batten bedroom creates an amazing look of simplicity while highlighting architectural details. The clean lines and texture instantly make any bedroom feel customised and thoughtful.
The best part is that board and batten offers incredible versatility with its unique charm. You can go traditional, modern, or anything in between.
Many people have transformed their bedrooms while staying on budget with this technique, the materials are affordable, and the impact is huge.
Here, I’m walking you through 12 gorgeous board and batten bedroom ideas that’ll inspire you. Plus, I’ll share instructions on how to install it yourself, some important do’s and don’ts and other important topics too.
Ready to give your bedroom walls that wow factor. So, let’s jump right in and get inspired.
Are board and batten walls still in style?
If you are wondering, board and batten is another passing trend then it’s not.
Board and batten has actually been around for a long time. It started as a way to improve insulation and protect homes from the elements. Now it’s evolved into an interior design element that adds character.
What makes it stay is its adaptability. You can make it traditional or modern depending on how you style it. Change the spacing, paint it a bold color, or keep it classic white.
I’ve seen board and batten regain popularity over the last few years. Interior designers on social media can’t get enough of it, and neither do homeowners looking for affordable ways to add architectural interest.
12 Ideas to Style Board and Batten Bedroom
Let’s look at 12 amazing ways to help you create a stunning board and batten bedroom. Each of these ideas can be customized to your style, space, and budget. The possibilities are endless.
So, these ideas are versatile, different from each other and budget conscious. Let’s go right into it and find the relevant way according to your liking.
White board and batten around windows and door

This has to be one of the favorites, framing your windows and doors with white board and batten creates a polished, custom feel.
The white color makes the trim pop against any wall color. It draws your attention to the windows and door, like putting a beautiful frame.
This approach works well if you don’t want to cover the entire wall. You can start small and get that custom, high-end look.
Wainscoting style with half wall
Half-wall board and batten gives classic wainscoting look that never goes out of style. I love this option because it’s so versatile.
You can go with a traditional height, or push it higher for drama. Paint it white with a contrasting color above, or go bold with a dark color on the board and batten portion.
What’s cool about this style is you can add a small ledge at the top to display small art pieces, plants, or photos. It instantly becomes both decorative and functional.
My friend used this style in her son’s bedroom, and it’s grown with him from toddler to teen by changing the wall color above the wainscoting.
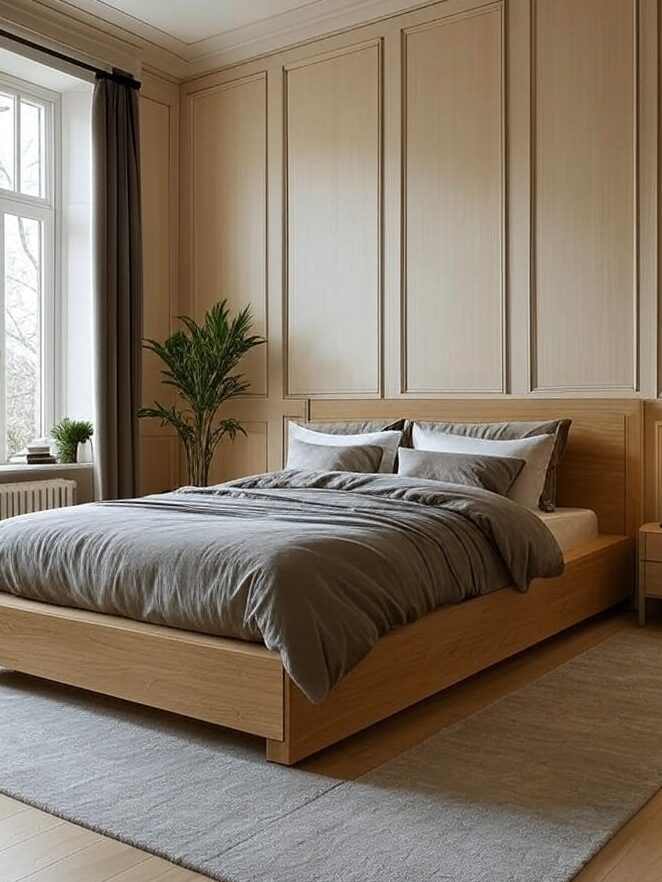
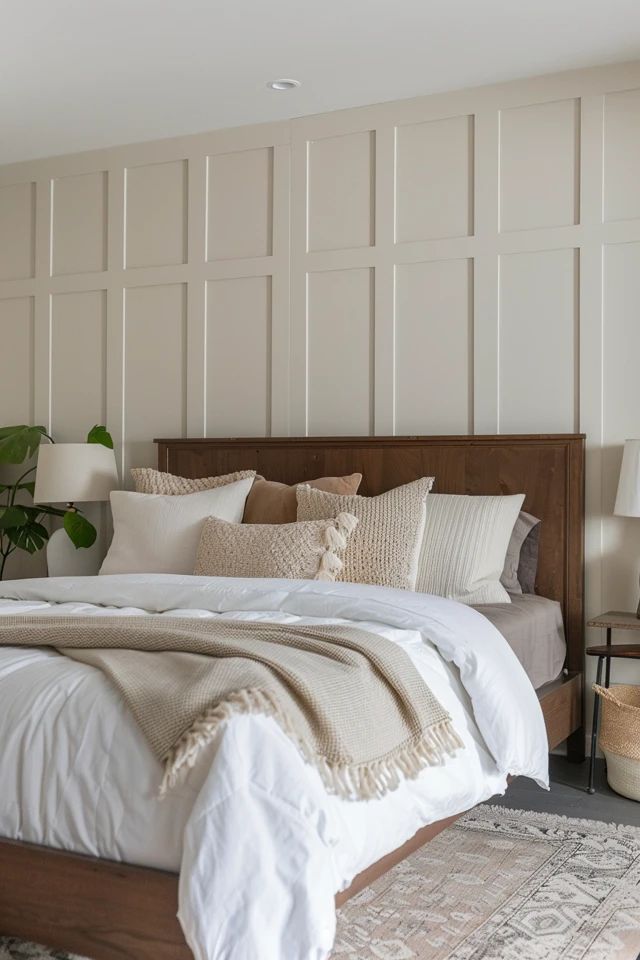
Create full board and batten bedroom wall
A full board and batten accent wall creates an impact in a bedroom.
I recommend choosing the wall behind your bed for this treatment. It creates a stunning focal point and works as a permanent, architectural headboard.
What’s fun about a full wall is playing with different batten spacing. You can go wide for a modern look or narrow for something traditional.
When you approach this look, your room instantly feels expensive and customised.
Asymmetrical board and batten layout
Try an asymmetrical layout if you want to consider something different.
Instead of perfectly spaced battens, you can create an irregular pattern which is unique. This works well in modern and traditional bedrooms.
I saw this in a designer showcase home and couldn’t believe how cool it looked. Some battens were close together while others were further apart. It created this awesome rhythm.
This approach does require planning, but the result is worth it. You’ll have a one-of-a-kind wall that makes your bedroom stand out with perfectly symmetrical board and batten rooms.
Board and batten with chevron pattern
Adding a chevron pattern to your board and batten wall takes this technique to a new level, it adds a statement.
The chevron creates movement and visual interest that standard vertical or horizontal battens can’t match. It works well on an accent wall behind the bed.
This is definitely advanced than basic board and batten. You’ll need to be comfortable making angled cuts. But if you’re up for this then the results are going to be incredible.
Paint it all one color for a subtle textured look, or use contrasting colors to really highlight the pattern.
Board and batten bedroom with artwork wallpaper

This is my favorite trick for getting the best of both. Install board and batten on the lower portion of your wall, then add a wallpaper above it.
I love this approach because it gives you architectural detail on the bottom while allowing you to have fun with the pattern and color above
The board and batten acts as a frame for your wallpaper, making it look intentional and high-end. And if you ever get tired of the wallpaper, you can swap it out without touching your beautiful board and batten.
Remember your wallpaper coordinates with your board and batten color. They should complement each other, not go against each other.
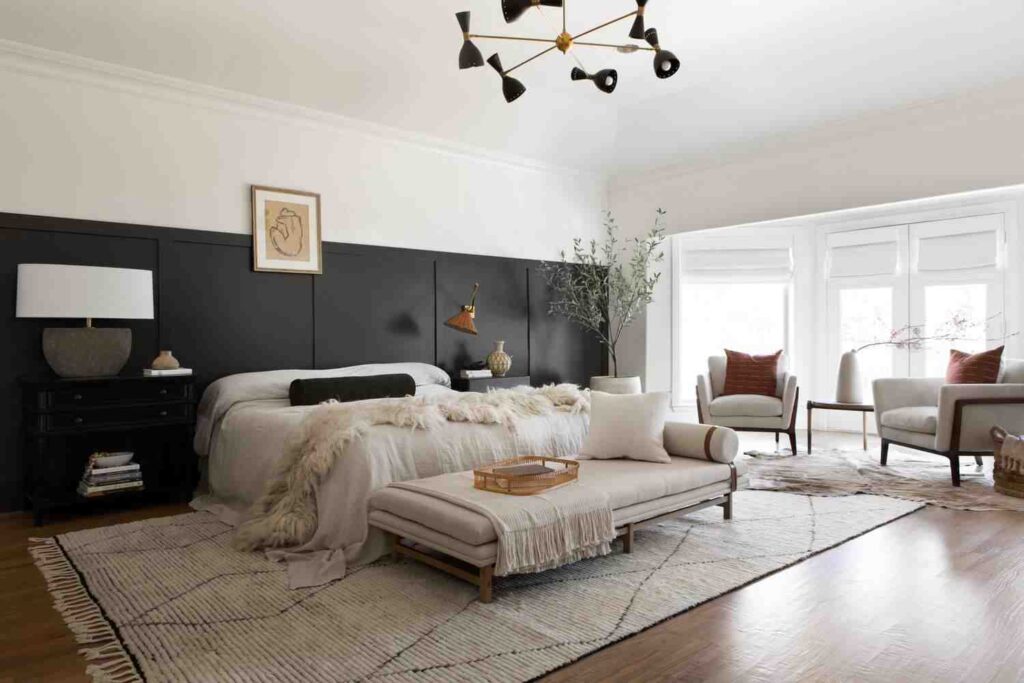
Two-tone styled board and batten

Why choose one color when you can have two. Two-tone board and batten adds depth and visual interest to the walls.
You could paint the boards one color and the battens another or paint the recessed areas between battens a different color than the battens.
I recently saw a bedroom with navy blue battens against a white background. The contrast was stunning.
This approach gives you the texture of the board and batten with the added dimension of color contrast and balance.
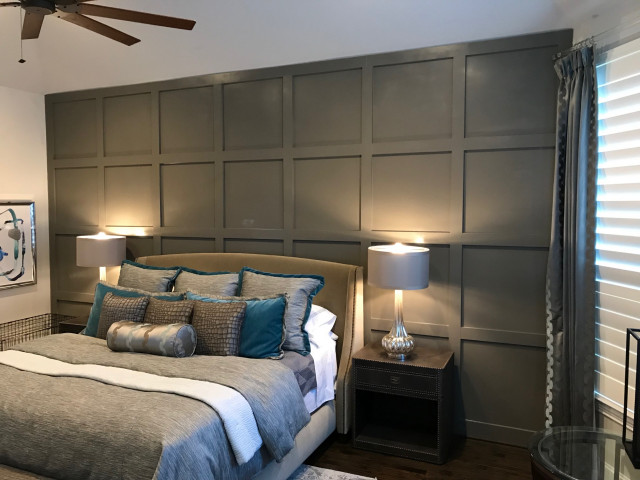
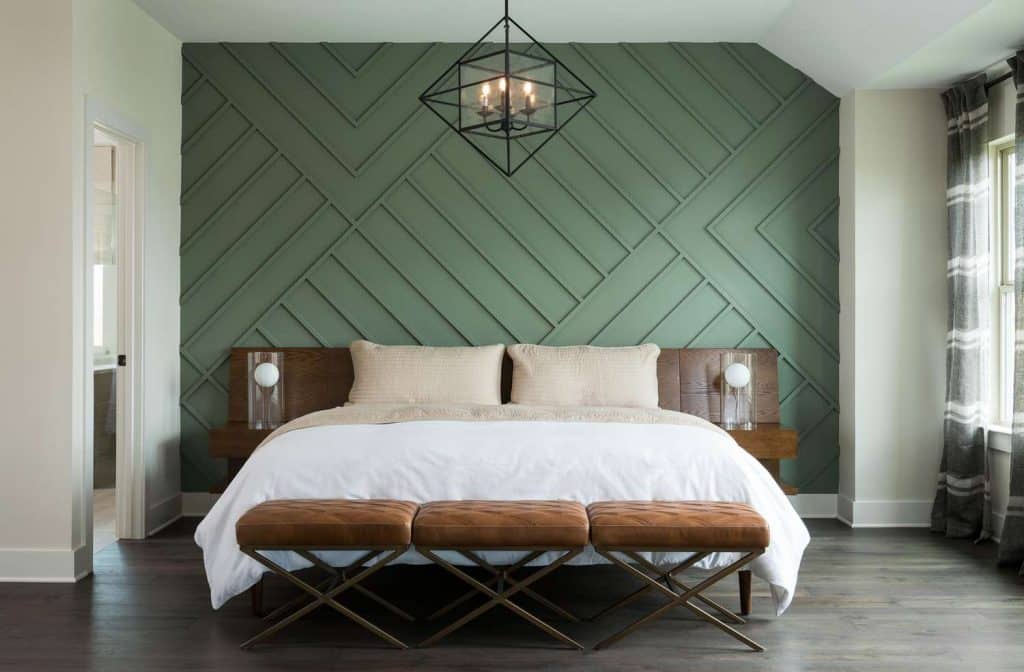
Geometric pattern board and batten bedroom
Geometric pattern boards and battens use battens to create shapes like diamonds, squares, or rectangles on your wall.
This style makes a statement and turns your wall into a piece of art. It works well in modern and contemporary bedrooms.
I watched my neighbor install this in her bedroom, and while it took more planning than a standard board and batten, the result was worth it.
Paint all the geometric shapes the same color for a subtle textured look, or go bold by painting the shapes in contrasting colors. Either way, you’ll have a unique bedroom.
Black-colored board with white batten
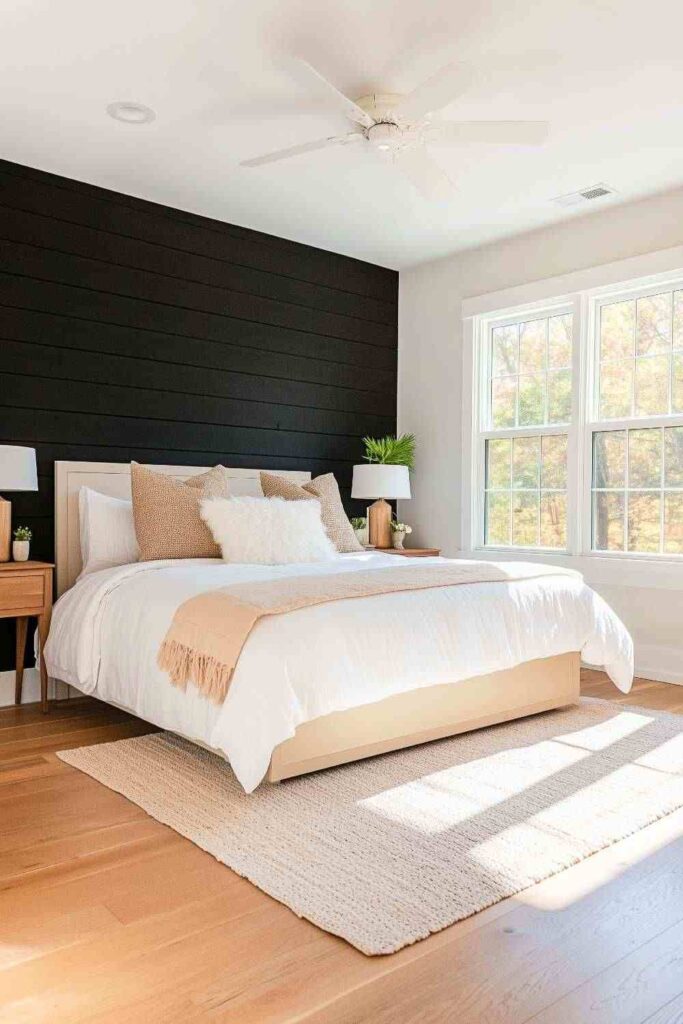
Black boards with white battens create contrast that instantly makes your bedroom look designer and intentionally customised.
This high-contrast look is perfect if you love modern or traditional style. It creates clean lines and bold visual impact.
What I love about this option is how it frames the rest of the bedroom decor. Your bed, nightstands, and accessories will pop against this backdrop.
Be aware that dark colors can make a small room feel smaller, so this works best in medium to large bedrooms or as an accent wall in small spaces.
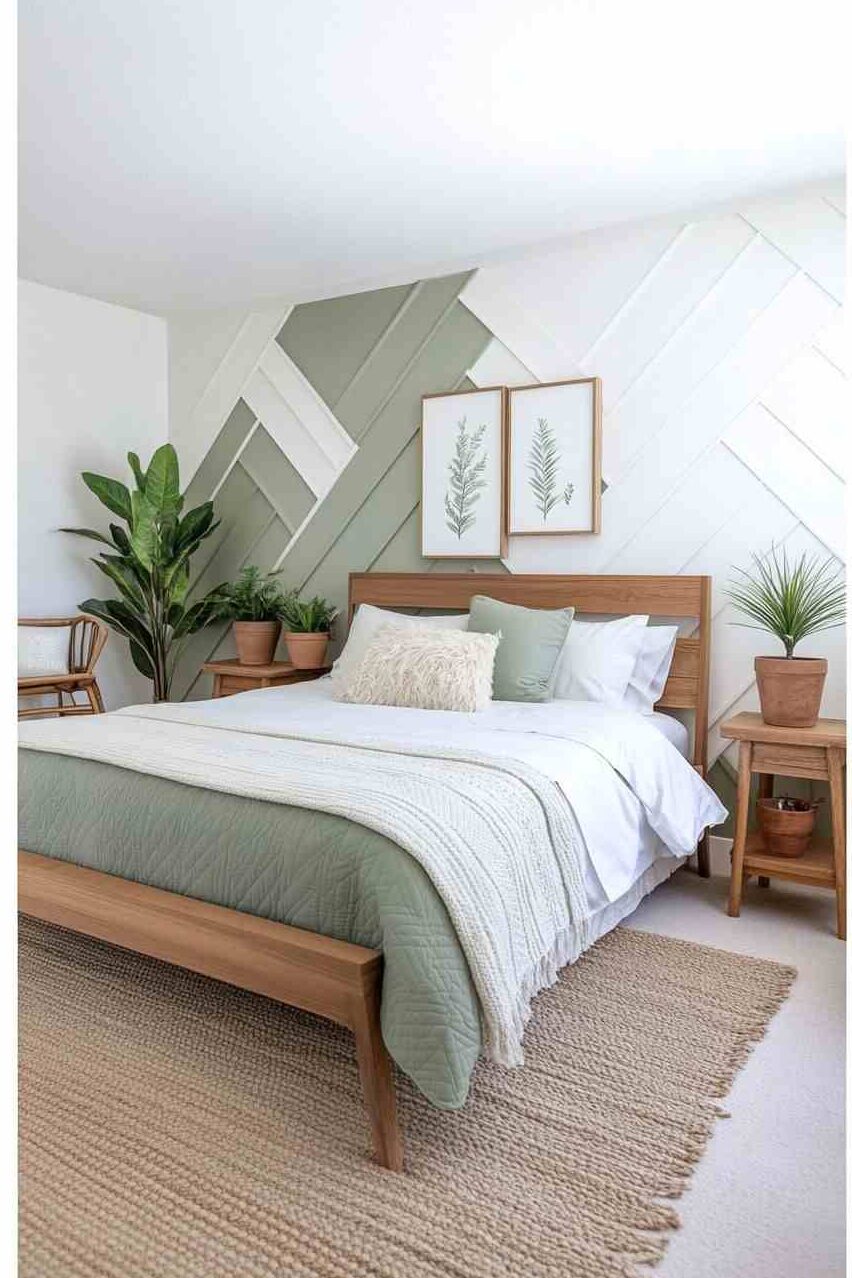
Diagonal battens
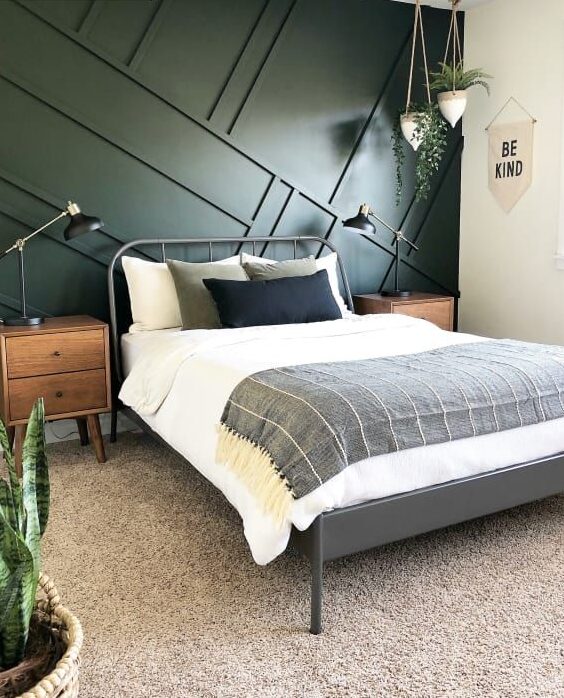
If you want to add movement to your walls, diagonal battens are what you should go-for.
Instead of the traditional vertical battens, installing them at an angle creates dynamic visual interest. Your eye follows the diagonal lines, making the room feel large and energetic.
I tried this in a small guest bedroom with low ceilings, and the diagonal lines actually made the room feel taller. It works like magic.
This style works wonderfully with both modern and traditional décor. Just keep the rest of your bedroom simple so the diagonal lines can really show their pattern.
Floor to ceiling board and batten
Floor-to-ceiling board and batten makes a major statement in the bedroom.
This approach turns your ordinary walls into stunning architectural features. It’s like living inside a custom-built home, if you’re in a basic builder-grade house.
I love how right floor-to-ceiling board and batten draws your eye, making ceilings appear high. It’s effective in rooms with tall ceilings, but can work in standard-height rooms too.
Paint it all one color for a subtle, elegant look, or use contrasting colors to highlight the texture and pattern. With this your bedroom will feel luxurious.
Plaid style board and batten wall
Why choose between horizontal and vertical when you can go with both. Plaid-style board and batten uses both directions to create a grid pattern on your wall.
This style is incredibly versatile. Make the grid large for a modern look or small for traditional. The grid creates perfect squares or rectangles that add amazing texture to your bedroom.
My friend used this style in her farmhouse bedroom, and it perfectly complemented her rustic decor. The plaid pattern added the right amount of structure and interest without overwhelming the space.
This style requires more materials and planning than standard board and batten, but the result is special and unique.
How to install a board and batten in the bedroom?
Let’s talk about how to actually make these gorgeous walls happen in your own bedroom. I promise it’s not as hard as it looks, so get ready to be inspired more.
Board and batten is actually one of the beginner-friendly wall treatments you can DIY. With some basic tools and patience, you can transform your bedroom into something intentional.
Materials required
Here’s what you’ll need to gather before starting your project:
- MDF boards (I find 1×4s work well for battens and 1×2s for trim)
- Construction adhesive
- Nail gun and nails (16 or 18 gauge works best)
- Miter saw or hand saw
- Level
- Measuring tape
- Pencil
- Stud finder
- Spackle or wood filler
- Caulk and caulk gun
- Sandpaper (medium and fine grit)
- Primer
- Paint and painting supplies
Pro tip: Most home improvement stores will cut your boards to size if you don’t have a saw, so go with the measurements.
Plan your design
Before buying materials, decide exactly what style of board and batten you want. Sketch it out on paper or use painter’s tape on your wall to visualize the design.
Consider the height, width between battens, and whether you want horizontal pieces as well.
I always take measurements and create a diagram showing exactly where each piece will go.
In rooms with high ceilings, you can go taller with your board and batten. For standard ceilings, keeping it to about 2/3 the height of the wall often looks best.
Measure your wall
Grab your measuring tape and get accurate wall dimensions. Measure the length and height of the wall.
If you’re doing a half-wall treatment, decide how high you want it to go. About 32-40 inches is standard for traditional wainscoting, but you can go high for a dramatic look.
Once you have the total dimensions, calculate how many battens you’ll need based on your desired spacing. I like to space mine about 16-20 inches apart for a classic look, but you can go wide or narrow depending on your preference.
Prepare the wall surface
This step is important for a professional-looking finish.
Remove any baseboards if needed. If you’re keeping them, you’ll need to plan how your board and batten will work with the baseboards.
Fill any holes in the wall with spackle and sand smooth. Clean the walls thoroughly to remove dust and dirt.
If your walls have a heavy texture, you want to install a thin sheet of smooth MDF as your backing board before adding the battens. This gives you a perfectly smooth surface to work with.
Attach the vertical and horizontal board and batten
Start by installing your bottom horizontal board if you’re not using the existing baseboard. Use a level to make sure it’s straight.
Next, add your top horizontal board at your desired height.
Now for the vertical battens. Measure and mark where each one will go. Try to hit wall studs where possible for security.
Apply construction adhesive to the back of each batten, then secure with nails. Check each one with a level before nailing to ensure they’re perfectly vertical.
If your design trend includes horizontal pieces, add those last, checking with a level as you go.
Fill the gaps and caulk
Filling gaps and caulking transforms your project from DIY to professional-looking.
Use wood filler to fill all nail holes and any gaps between boards that meet at corners.
Run a thin bead of caulk along all edges where the boards meet the wall. This creates a seamless look between your boards and the wall.
Don’t skip this step because it makes all the difference in the final look of your board and batten.
Sand and apply primer
Once the wood filler and caulk are completely dry, sand everything smooth. Start with medium-grit sandpaper, then finish with fine-grit for a smooth surface.
Wipe away all dust with a damp cloth.
Apply a good quality primer to all of your board and batten surfaces. This helps the final paint adhere better and gives you a durable finish.
I like to use a small foam roller for smooth surfaces and an angled brush for corners and tight spots.
Paint board and batten
The final step is to choose a semi-gloss or satin finish paint for your board and batten. This finish is easier to clean than paint, which is important for walls that have dimension and collect dust.
Apply at least two coats of paint for the best coverage and durability. Allow proper drying time between coats.
Use a brush for cutting in around edges and a small roller for the flat surfaces. This gives you a smooth finish without brush marks.
Once everything is dry, step back and admire your amazing work. You’ve added style and value to your bedroom.
Do’s and Dont’s for installing board and batten
Let me share some lessons I’ve learned the hard way so you don’t have to.
Do’s:
- Do plan your design carefully before purchasing materials
- Do use a level constantly throughout installation
- Do pre-paint your boards for easy application if you’re painting them in a different color
- Do caulk all seams where boards meet the wall for a professional finish
- Do use wood glue in addition to nails for security
- Do consider the location of outlets and switches in your design
- Do take your time measuring and cutting for precise fits
Dont’s:
- Don’t rush the project, it’s worth taking your time for precision
- Don’t skip the caulking step, it makes a huge difference
- Don’t forget to account for baseboards and crown molding in your measurements
- Don’t assume your walls or floors are perfectly straight, always measure
- Don’t try to install heavy boards by yourself, get help
- Don’t skimp on paint quality, cheaper paints won’t hold up
- Don’t forget to sand between coats of paint for a smooth finish
What is the modern alternative to board and batten?
Looking for something contemporary than traditional board and batten then here are some modern alternatives.
Flat panel wall treatments use wider, flush boards to create geometric patterns without the raised battens. This creates a sleek, minimal look while adding architectural interest.
Slat walls are popular right now. Thin wood slats installed vertically with small gaps between them create amazing texture and dimension. They’re perfect for modern and Scandinavian-inspired bedrooms.
3D wall panels are another option. These come in a variety of patterns and are made from lightweight materials that adhere directly to your wall. They offer texture with minimal installation effort.
Channel tufting wall panels bring soft texture instead of wood. These upholstered panels can be installed on your wall for a luxurious feel that’s also great for sound absorption.
Whatever style you are going for, there’s a wall treatment out there that can transform your bedroom from basic to beautiful.
Conclusion
Board and batten bedroom walls are an amazing way to add, style, and value to your home without spending much. From simple white wainscoting to bold geometric patterns, there’s a board and batten style for every taste.
The best part about board and batten is its staying power. Unlike trendy wallpapers or paint colors that feel outdated sometimes, architectural details like board and batten have a staying power.
With a measuring tape and MDF boards, get ready to create a bedroom that feels custom, cozy, and full of character. Your walls are a canvas which are waiting for your touch.
I hope these 12 ideas have inspired you to create your board and batten bedroom. Remember, you don’t need to be a professional carpenter to achieve these looks. With some planning, basic tools, you can completely transform your space.